Stop bubbles, haze, and soft spots. Learn the ideal epoxy curing range (72–78°F, 35–50% RH), what goes wrong when it’s too hot/cold or humid, and easy ways t...
How to Prevent and Remove Micro-Bubbles in Epoxy Resin

Ruby Fletcher
Ruby Fletcher is a dedicated resin crafter with years of hands-on experience pouring, molding, and creating custom epoxy art. After turning her dining room into a makeshift studio, she developed a passion for helping beginners navigate the sticky, colorful world of resin with confidence. She loves sharing practical tutorials, troubleshooting tips, and essential safety guides to make epoxy crafting accessible for everyone.
Published · Last updated
The first time I poured a “clear” coaster with my garden flowers, it looked perfect in the cup. Then it cured with a snowy haze of tiny pinprick bubbles, especially around every petal edge. I learned fast that fine bubbles are sneaky, but they are also very beatable once you know where they come from and when you still have time to pop them.

This guide walks you through prevention first (my favorite kind of troubleshooting), then the best ways to remove micro-bubbles after you pour, plus what to do if they show up after curing.
What micro-bubbles are
Micro-bubbles are the tiny, suspended bubbles that make resin look slightly cloudy or “sparkly” instead of glass-clear. Unlike big, obvious bubbles you can pop easily, micro-bubbles often:
- hide in the resin like a fine mist
- collect along textured surfaces, wood grain, and flower edges
- rise slowly, especially in thicker pours or cooler rooms
- multiply when resin is mixed too aggressively or warmed incorrectly
If you are also fighting tacky cures or softness, address that first because under-cured resin can trap bubbles and haze. This troubleshooting guide helps: 8 reasons your epoxy resin is sticky or soft (and how to fix it).
Before you start: better conditions
Work at the right temperature and humidity
Cold resin is thick resin, and thick resin holds onto bubbles. High humidity can also contribute to moisture-related surface issues (like blush, cloudiness, or dull patches) that can be mistaken for micro-bubbles.
- Aim for warm, steady room temps during mixing and curing.
- Keep humidity moderate, especially for glossy topcoats.
- Warm your space rather than blasting heat directly at a curing piece.
If you want a solid target range and practical setup tips, I keep my full curing environment notes here: Ideal temperature and humidity for epoxy resin curing.
Use a calm, ventilated workspace
When you are popping bubbles with heat tools, you want ventilation and breathing protection handled before you ever open the bottles. Here are my go-to safety starting points:
Prevention 1: warm the resin
Warming resin lowers viscosity so bubbles can rise and pop on their own. The key is gentle warming, not cooking your resin into a flash cure.
Warm water bath method (my most reliable bubble reducer)
This is the method I use when I care about clarity, like jewelry doming and flower casts.
- Keep Part A and Part B bottles sealed. Do not open them yet.
- Set bottles in warm water (think comfortably warm, not boiling) for 10 to 15 minutes.
- Dry the bottles completely before opening so no water or condensation drips into your resin.
- Measure and mix as usual once the resin is warmed.
Water contamination is one of the fastest ways to get cloudiness and weird surface texture, so I am picky about drying the bottles and my gloved hands before I pour.
What not to do when warming resin
- Do not microwave mixed resin. It can overheat in seconds, create a runaway reaction, and trap new bubbles as it foams.
- Do not warm open bottles. Keeping bottles sealed helps prevent water or condensation contamination, and it also avoids thickening or skinning near the bottle neck where exposure and temperature shifts can change how the resin pours.
- Do not over-warm for deep pours. Warmer resin cures faster, which can lock bubbles in place sooner.
Prevention 2: mix without whipping air
Most micro-bubbles are introduced during mixing. The good news is that mixing technique is completely in your control.
My low-bubble mixing routine
- Measure accurately and scrape your measuring cup walls so the ratio stays correct. (Ratio errors can also create persistent bubbles because the resin never cures properly.)
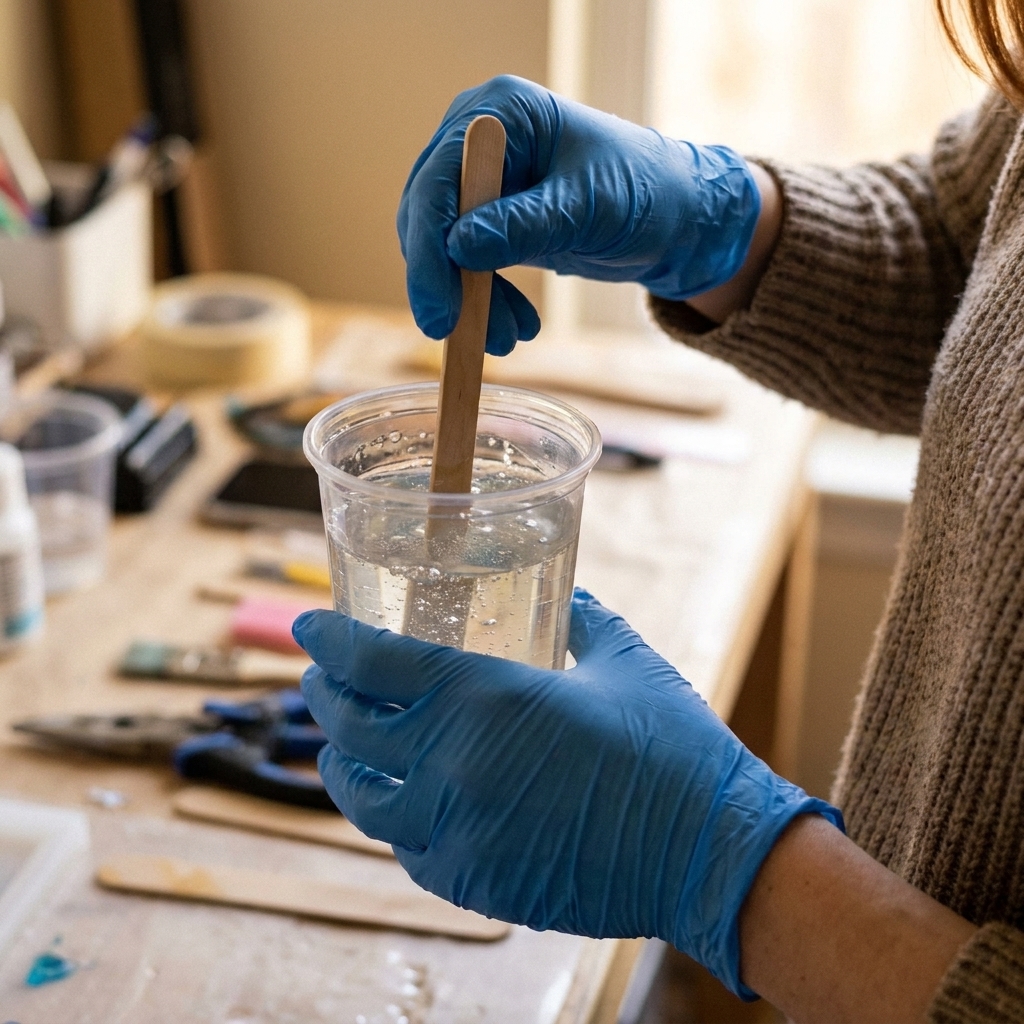
- Use a flat stir stick and stir slowly, folding and sweeping rather than whisking.
- Scrape sides and bottom for a full mix without frantic motion.
- Mix longer, not faster. Slow and steady makes fewer bubbles than a quick whip.
- Let the cup rest for 2 to 5 minutes after mixing so bubbles can rise.
If you want a step-by-step for clean measuring and a thorough mix (without the “mystery soft spots”), I laid it out here: How to measure and mix 2-part epoxy resin.
Optional: double-cup mixing
If I am making something where clarity is everything, I use the “double-cup” method:
- Mix in Cup 1, scraping sides and bottom.
- Pour into a clean Cup 2 (leave streaky residue behind).
- Stir slowly again for 30 to 60 seconds.
This reduces unmixed streaks that can trap bubbles or cure differently and look like haze.
Quick note on pigments and additives
Mica, glitter, paste pigments, and alcohol inks can change viscosity and they can trap air if you stir aggressively. My approach is simple: fold them in gently, give the cup a short rest, and do one more light bubble check after pouring. If you are using alcohol ink, be especially cautious with open flame and heavy heat.
Prevention 3: pour so bubbles can escape
Pour in a thin stream
A thin, steady stream helps break bubbles on the way down and reduces the “glug” that folds air into corners.
Pour in layers for deep molds
Deep pours can keep bubbles suspended for a long time. If your resin system allows layering, multiple thinner pours can be clearer than one thick one.
Paint the mold first for detailed cavities
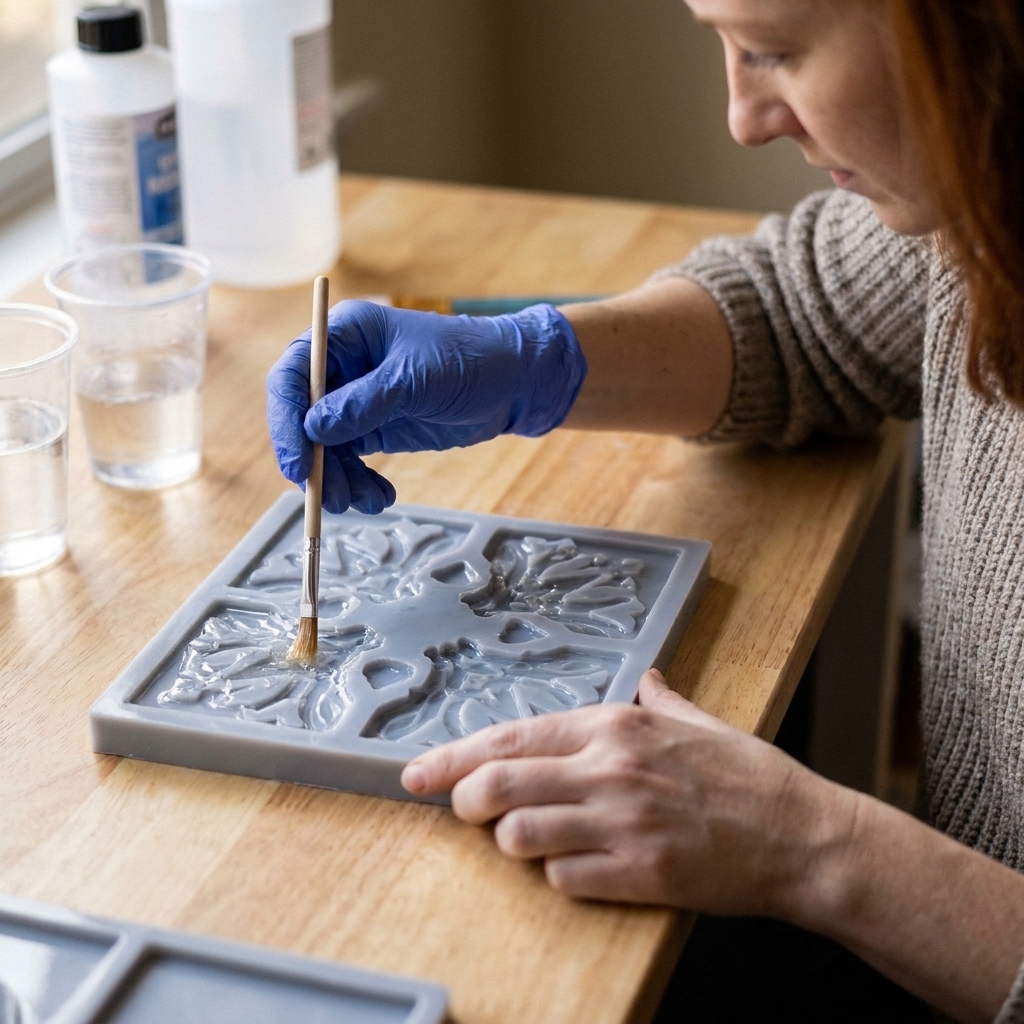
For silicone molds with texture, letters, or sharp corners, I often:
- Use a disposable brush or stir stick to push a small amount of resin into details first.
- Then fill the mold slowly.
This prevents bubbles from camping out in corners. It also physically wets the detail so air has less chance to cling there.
Mold prep matters too. If your mold is dusty or has residue, it can create bubble cling. Here is my mold care routine: Silicone molds for resin: choose, prep, and care.
Seal porous materials before embedding
Wood, paper, dried flowers, and some shells can release air into resin for a long time (sometimes hours), especially as the piece warms during cure. That shows up as persistent micro-bubbles right at the surface of your embed.
My fix: seal first with a thin coat of resin (or an appropriate sealer), let it partially cure, then embed. This is especially helpful for pressed flowers and anything with tiny air pockets.
Watch warm substrates
One sneaky scenario: you warm your resin (great), then pour into warm wood or a warmed mold. Heat can make porous materials off-gas faster. If you are casting onto wood, a seal coat first is your best defense.
Removing micro-bubbles after you pour
Once the resin is in the mold or on your surface, your best bubble-removal window is early, while the resin is still thin enough for bubbles to rise. Different tools work better for different projects.
Method 1: heat gun
A heat gun warms the surface and helps bubbles rise. It can also push resin around, so use it carefully on domes and coaster edges.
- Hold it farther back than you think you need.
- Keep it moving in quick passes.
- Watch edges so you do not blow resin out of a mold.
Best for: trays, canvas-style pours, flat topcoats.
Method 2: small torch
A small butane torch is my favorite for that last bit of “glass” finish. You are not trying to roast the resin. You are just trying to “kiss” the surface with brief heat so the top layer thins slightly, bubbles expand, and they pop.
- Quick passes only, 1 to 2 seconds per area.
- Do not hover or you can scorch resin, warp molds, or cause rippling.
- Be extra cautious around alcohol inks and solvents, and always work with ventilation.
Best for: coasters, glossy top layers, pieces where you can safely control heat.
Method 3: isopropyl alcohol mist
A light mist of isopropyl alcohol can help some surface bubbles pop by briefly changing how the surface flows. Use this cautiously. It is more common in some art resin workflows and less reliable with casting and deep pour systems.
- Mist lightly, do not drench.
- Test first because some resins can develop haze, pitting, fish-eyes, or cure issues depending on formula and conditions.
- Keep away from flames and do not combine with torching until alcohol has fully flashed off.
Best for: small surface bubble clusters when you do not want to use heat.
Method 4: toothpick pop and edge check
I keep a toothpick or stir stick nearby and do a slow perimeter walk:
- drag bubbles out of corners
- poke bubbles trapped against embeds
- check around letters and sharp mold details
This is also when I skim any visible dust or glitter clumps before they sink.
Do a second bubble check
Fine bubbles can keep rising for a while. I check at:
- 5 minutes after pouring
- 15 to 20 minutes after pouring (depending on working time)
After resin starts to thicken (think syrup moving toward honey), aggressive bubble chasing can leave marks and swirls that cure in place.
Equipment note: pressure pot vs vacuum
If you cast often and want the cleanest results, specialty tools can help. Pressure casting (pressure pot) compresses bubbles so they become too small to see in cured resin, which is why it is popular for molds. Vacuum degassing pulls air out before pouring, but it can cause resin to foam up and overflow, especially with faster systems or larger batches. These are optional, but it helps to know what they are actually good at.
If bubbles show up after curing
If the piece is already cured, the bubbles are locked in. At that point, you are choosing between living with them, disguising them, or resurfacing.
Option 1: sand and recoat
For trays, coasters, and flat art, sanding and applying a fresh flood coat is usually the cleanest fix.
- Sand evenly to remove the bubbly top layer and give tooth for the next coat.
- Clean thoroughly so sanding dust does not become the next coat’s bubble problem.
- Recoat with warmed, carefully mixed resin and pop surface bubbles early.
Option 2: dome the surface
For jewelry pieces and small castings, a dome coat can visually hide shallow micro-bubbles near the surface, as long as the base is fully cured and scuffed if needed for adhesion.
Option 3: embrace it
This is not my first choice for “crystal clear,” but micro-bubbles can look like underwater fizz in ocean art, faux stone, or galaxy pours. If you are doing functional pieces like coasters, I still prefer clarity for easy cleaning and a smoother finish.
Quick fixes by cause
- Bubbles everywhere in the cured piece: resin was too cold, mixed too fast, or poured too thick. Warm bottles, slow your stir, pour thinner layers.
- Bubble clusters around flowers or wood: porous embed off-gassing. Seal embeds before casting or do a thin seal coat first.
- Bubbles trapped in mold corners: pour too quickly or skipped detail coating. Paint resin into corners before filling and use a toothpick.
- Foamy or rippled surface after heat: heat was too close or too long. Use quicker passes and increase distance.
- Cloudy look that is not just bubbles: possible moisture contamination, high humidity, or cure issues. Check your environment and your ratio.
Heat tools and safety
Micro-bubble removal is one of the most common moments beginners reach for extra heat or solvents. Please set yourself up safely:
- Ventilation first. Use a properly ventilated workspace: safe ventilated resin workspace at home.
- Wear proper PPE for resin work: respirators, gloves, and eye protection.
- Know what is on your table. Alcohol sprays and open flames do not mix.
- Keep silicone molds in mind. Too much direct heat can warp molds or create ripples along edges.
FAQ
How long should I wait before popping bubbles?
I start immediately after pouring with a quick surface pass (torch or heat gun), then check again 10 to 20 minutes later. After the resin thickens into that syrupy stage, popping can leave marks that cure in place.
Will a torch remove bubbles inside the resin, not just on top?
Not really. A torch mainly handles surface bubbles by briefly thinning the top layer so bubbles can expand and burst. Preventing micro-bubbles with warm resin, slow mixing, and smart pouring is what keeps bubbles from getting trapped throughout the piece.
Do micro-bubbles go away on their own?
Sometimes, if the resin is warm and thin enough, many bubbles will rise and pop naturally during the first part of the working time. If your room is cool or the pour is deep, they often stay suspended.
Are micro-bubbles worse with UV resin or 2-part epoxy?
Both can bubble, but the causes look a bit different. UV resin bubbles are often from stirring and from curing too quickly at the surface. Epoxy micro-bubbles are often temperature, mixing, and off-gassing related. If you are deciding between the two, this breakdown helps: UV resin vs 2-part epoxy.
A simple routine for clearer pours
If you want a no-drama checklist, here is the routine that gives me the clearest results most consistently:
- Warm sealed bottles in a warm water bath for 10 to 15 minutes and dry them fully.
- Measure carefully and mix slowly, scraping sides and bottom.
- Let the cup rest 2 to 5 minutes.
- Pour in a thin stream and take your time in corners and around embeds.
- Pop surface bubbles with quick heat passes, then do one more check before the resin turns syrupy and starts to gel.
It is not fancy. It is just repeatable. And once you do it a few times, crystal-clear pours stop feeling like luck and start feeling like a skill you can count on.