Micro-bubbles can turn a “clear” epoxy pour hazy fast. Learn where they come from, how to prevent them with warm resin and slow mixing, plus the best ways to...
Heat Gun vs. Butane Torch for Resin Bubbles

Ruby Fletcher
Ruby Fletcher is a dedicated resin crafter with years of hands-on experience pouring, molding, and creating custom epoxy art. After turning her dining room into a makeshift studio, she developed a passion for helping beginners navigate the sticky, colorful world of resin with confidence. She loves sharing practical tutorials, troubleshooting tips, and essential safety guides to make epoxy crafting accessible for everyone.
Published · Last updated
The first time I tried to “pop bubbles” in epoxy, I got a little too confident with heat and a coaster that looked perfect suddenly turned into a wavy, fish-eyed mess. If you have ever watched tiny bubbles rise and thought, I just need more heat, you are in good company.
Both heat guns and butane torches can clear surface bubbles fast, but they do it in very different ways. Your best choice depends on the kind of project you are making, how comfortable you are with open flame, and what you have on your workbench.
Quick answer: which one should you use?
If you want my beginner-friendly rule of thumb:
- Choose a heat gun if you are brand new, working over silicone molds, using lots of glitter or mica, or you want the safest learning curve with fewer “oops” moments.
- Choose a butane torch if you want the fastest, clearest surface finish on flat pours (like coasters or trays), and you can follow flame safety to the letter.
And yes, many resin artists keep both and use them at different stages.
How each tool pops bubbles
Heat gun: warm air that briefly thins the surface
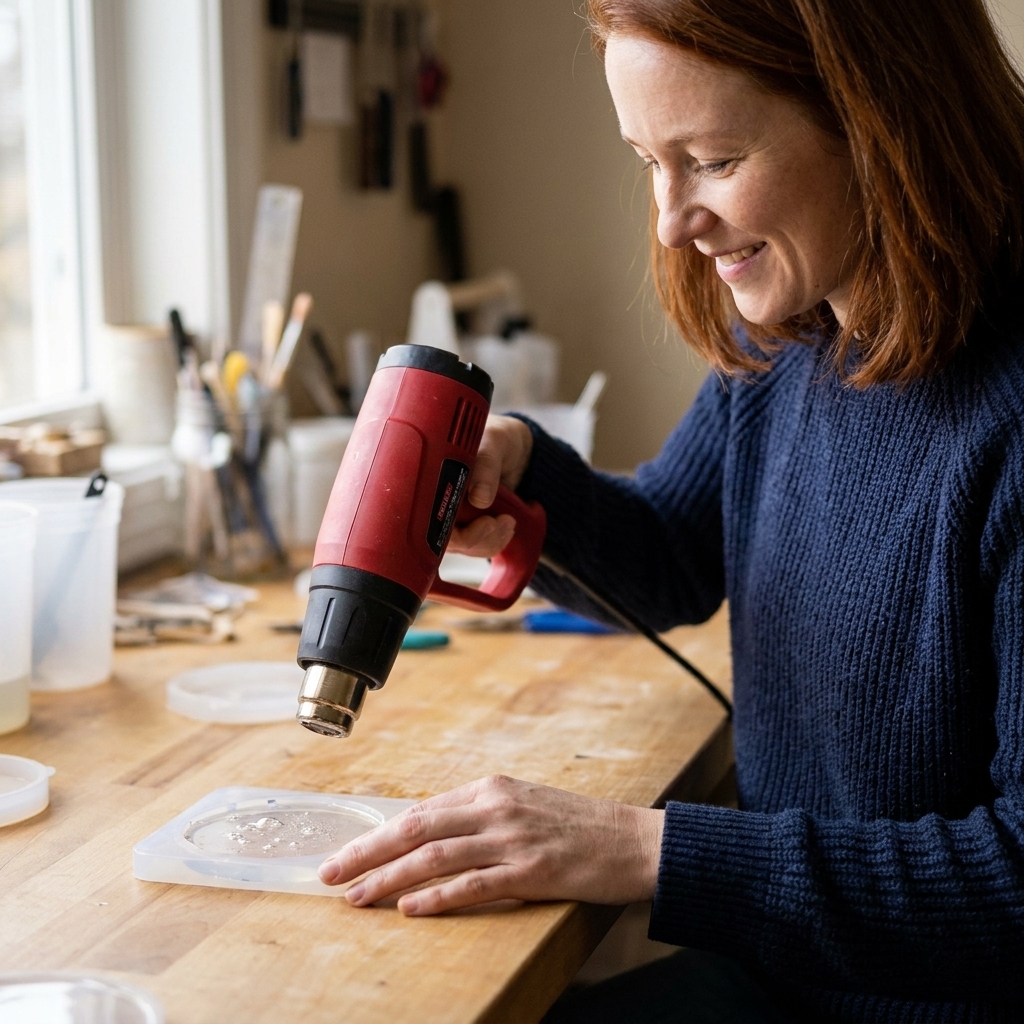
A heat gun blows hot air across the resin. That warmth briefly thins the top layer so bubbles can rise and break. Because the heat is spread out, it is gentler, but it can also push resin around if you aim too close or too long.
Butane torch: quick, intense heat right at the surface
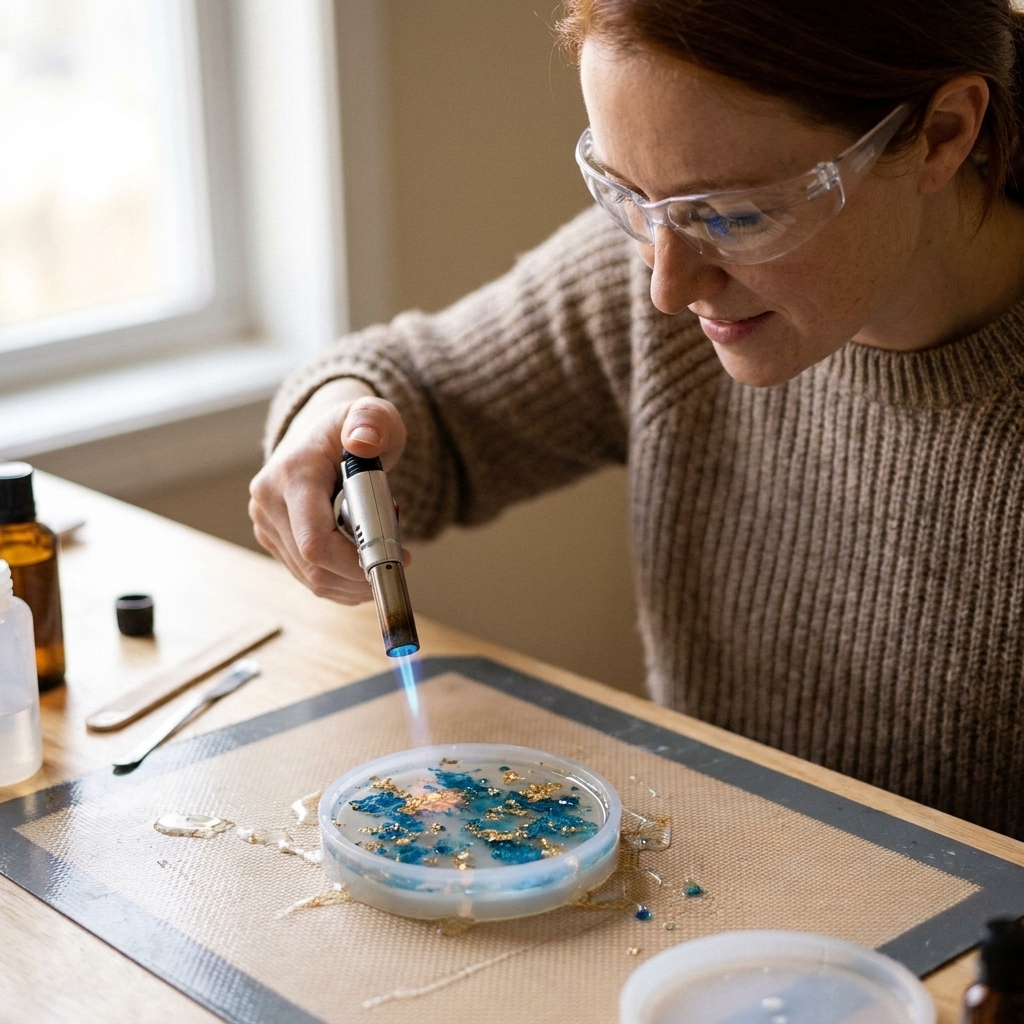
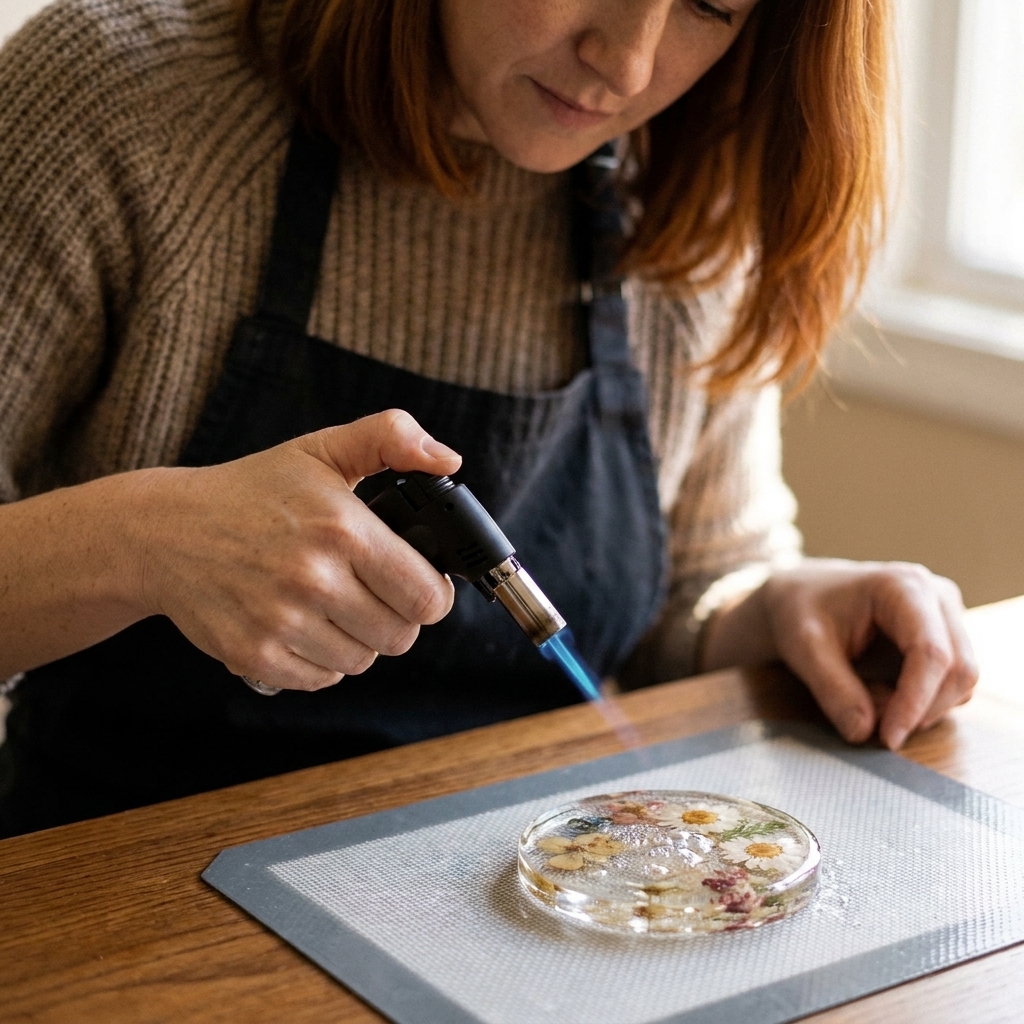
A torch passes a flame over the surface. The resin surface warms instantly, bubbles expand and pop, and you can get a super glassy look quickly. The tradeoff is that the heat is concentrated, so it is easier to scorch resin, warp molds, or ignite nearby materials if you are careless.
If bubbles are a constant struggle for you, it helps to fix the cause too. My bubble troubleshooting guide is here: How to Prevent and Remove Micro Bubbles in Epoxy Resin.
Prevent bubbles first
Heat tools are for the last little bit. The easiest bubbles to pop are the ones you never made.
- Mix slower than you think you need to. Scrape the sides and bottom, but avoid whipping air in.
- Let the mixed resin rest for 1 to 2 minutes so bubbles can rise before you pour.
- Pour in a thin stream and avoid splashing. For deep pieces, pour in layers instead of one thick dump. Help here: Pouring Epoxy Resin in Layers Without Visible Lines.
- Work at a resin-friendly temperature. Cold rooms make thick resin and stubborn bubbles. See: Ideal Temperature and Humidity for Epoxy Resin Curing.
- Choose the right resin for the job. A coating resin generally releases bubbles easier than a thicker deep-pour formula. If you are deciding between resin types, this helps: UV Resin vs. 2-Part Epoxy: What Beginners Should Choose.
Heat gun: pros, cons, and best uses
Pros
- No open flame, which is a big safety win for beginners.
- More forgiving around paper towels, alcohol wipes, and other studio clutter.
- Great for molds because you can keep distance and reduce the risk of direct scorching.
- Helpful for thicker resin after pouring because a brief pass can encourage surface bubbles to release (without cooking the resin in the cup).
Cons
- Can blow dust into your resin if your workspace is not clean.
- Can push resin out of place, especially in shallow molds and doming projects.
- Can cause ripples if you linger in one spot.
- Less effective on stubborn surface micro-bubbles than a torch on some flat pours.
Best uses
- Silicone molds (coasters, keychains, jewelry shapes)
- Pigmented pours with mica where you do not want to disturb patterns
- Projects with embeds close to the surface (flowers, paper, photos)
Butane torch: pros, cons, and best uses
Pros
- Fast and efficient, especially for clearing surface bubbles on flat pours.
- Excellent clarity when used correctly, because it flashes heat across the top without blowing resin around.
- Great for finishing passes after the resin has self-leveled.
Cons
- Open flame risk around alcohol, solvents, paper products, and hair or sleeves.
- Can scorch resin, creating dull spots or texture changes (like an orange-peel look).
- Can cause surface discoloration or speed up ambering in some resins, especially if you overheat. Yellowing is also affected by the resin formula, UV exposure, and cure conditions.
- Can damage silicone molds if the flame is too close, held too long, or aimed at the mold edge.
- Not ideal for deep cavities where you cannot safely pass the flame across the surface.
Best uses
- Flat pours in molds with wide openings (coasters, trays, panels)
- Clear coats where you want a glass-like top
- Final bubble pass before covering your piece to cure
Beginner-safe protocols
Before we talk technique, this is the non-negotiable foundation: resin safety and heat safety are a package deal.
- Ventilation first. Work in a properly ventilated area and use the right PPE. Start here: Set Up a Safe, Ventilated Resin Workspace at Home and Resin Safety Gear: Respirators, Gloves, and Eye Protection.
- Protect your table. Heat tools plus drips are a bad combo on wood. Use a spill-safe surface: Best Mats and Coverings for Resin Spills.
- Keep flammables away. Especially isopropyl alcohol, acetone, paper towels, sawdust, and aerosol sprays.
- Tie back hair and avoid loose sleeves. Torches are not forgiving.
- Do not aggressively heat resin in the mixing cup. Too much heat can shorten working time and trigger a fast cure. If your resin is curing wrong, check: 8 Reasons Your Epoxy Resin Is Sticky or Soft (and How to Fix It).
Heat gun safety checklist
- Start farther away than you think. Aim from about 6 to 10 inches away and move constantly.
- Use low heat if available. You want a gentle pass, not a blast furnace.
- Do short passes. A few seconds at a time, then pause and watch the surface.
- Watch for rippling. Ripples mean you are overheating or aiming too close.
- Mind the airflow. Blow away from your piece if you have loose glitter, pet hair, or dust nearby.
Butane torch safety checklist
- Clear your area first. No alcohol wipes, no paper towel piles, no clutter next to your work.
- Do not torch if you have used alcohol nearby. If you sprayed isopropyl alcohol, wait until fumes have fully cleared and the area is safe, or skip the torch entirely.
- Use a small torch with good control. A tight flame is easier to manage than a big roaring one.
- Keep the flame moving. Think “paintbrush strokes,” never “hover.”
- Stay above the resin. You are warming the surface, not cooking it. Keep distance and do quick passes.
- Avoid mold edges. Silicone can scorch or deform at the rim.
- Let bubbles rise first. Torch after the resin has had 1 to 2 minutes to self-level and release bubbles naturally.
- Turn off the torch between passes. Especially if you need to adjust your piece or step away.
Technique: step by step
Heat gun method
- Mix accurately and scrape the cup sides and bottom. Mixing errors create bubble and cure issues. If you need a refresher: How to Measure and Mix 2-Part Epoxy Resin.
- Pour and wait 1 to 2 minutes so bubbles can rise.
- Pass the heat gun across the surface from 6 to 10 inches away, moving continuously.
- Stop and watch. You will often see a cluster of bubbles pop a few seconds after you pass.
- Repeat once if needed. I prefer two gentle passes over one aggressive pass.
Butane torch method
- Pour and let the resin self-level for 1 to 2 minutes.
- Ignite the torch and set a small flame.
- Make fast passes across the resin surface, usually about 2 to 6 inches above the resin depending on your torch and flame size. Stay as far away as you can while still popping bubbles.
- Do not linger. Your cue is simple: bubbles vanish and the surface looks briefly glossy. If you see rippling, smoking, or a texture change, you are too close or too slow.
- Pause and inspect under good light. Torch again only if bubbles remain.
- Cover to cure to keep dust off.
If you are new to a torch, test your distance and speed on a small scrap pour first. It is the cheapest way to learn what “just enough” heat looks like.
Common mistakes
“I heated it and now my resin looks wavy.”
You overheated the surface or aimed too close. Let it self-level again, then switch to lighter passes. Next time, reduce heat and increase distance.
“My silicone mold looks warped or glossy around the rim.”
This is classic torch-too-close behavior. Keep flame away from mold edges and use quick passes. For delicate molds, a heat gun is often the safer call. Mold care basics here: Silicone Molds for Resin: Choose, Prep, and Care.
“I popped the top bubbles, but I still see tiny bubbles inside.”
Those are usually trapped from mixing, thick resin, porous embeds, or pouring too deep too fast. Try warming the bottles in a lukewarm water bath before mixing (cap closed, label above water line), then dry the bottles completely before opening so you do not drip water into your resin. Water contamination can cause cloudiness or foaming in some systems.
“My clear resin looks dull in spots.”
Too much heat, too long, or too close. A torch can do this quickly. Use fewer passes, increase distance, and save the torch for quick finishing sweeps.
Project recommendations
- Coasters and trays: Torch is excellent for a quick, clear finish. Heat gun works too, just be careful about ripples.
- Jewelry doming: Heat gun is usually safer because you are less likely to scorch a small piece or blow the dome out of place. Doming tips here: How to Dome Resin on Jewelry and Small Crafts.
- Flower and nature embeds: Heat gun first. Open flame plus delicate botanicals is a risk, and overheated resin can create odd halos. Embedding flowers guide: How to Dry and Embed Real Flowers in Epoxy Resin.
- Deep pours: Neither tool is a magic wand for bubbles deep in the resin. Focus on mixing technique, temperature, and pouring strategy. Temperature matters more than most beginners realize: Ideal Temperature and Humidity for Epoxy Resin Curing.
FAQ
Can I use a hair dryer instead of a heat gun?
You can, but I do not recommend it for consistent results. Hair dryers move a lot of air (dust risk) and often do not get reliably hot enough. A craft heat gun gives you more control.
Do I need to pop bubbles if my resin is self-leveling?
Often yes, at least for the surface. Many resins self-level but still trap micro-bubbles, especially if you mixed briskly or poured into detailed molds.
Should I use isopropyl alcohol spray to pop bubbles?
Some artists do, but be extra cautious: alcohol is flammable. If you plan to torch, do not spray alcohol anywhere near your piece. I prefer heat tools and good mixing technique instead.
What if I overheat and my resin starts curing too fast?
Stop adding heat immediately, move the piece to a safe, ventilated area, and let it do what it is going to do. If it cures with defects, you can often sand and re-coat later. Finishing help: How to Sand and Polish Epoxy Resin.
My pick for beginners
If you are choosing your first bubble tool, I would start with a small heat gun. It is easier to learn, safer in a cluttered craft space, and versatile across molds, color work, and small projects.
Once you are comfortable, adding a small butane torch can level up your finishes on flat pours fast, as long as you keep your workspace clear, keep your distance, and keep your flame moving.
And if you want to reduce bubbles before you ever touch heat, start with your setup and supplies. My beginner essentials list is here: Beginner Resin Art Supplies: Your Essential First Pour List.