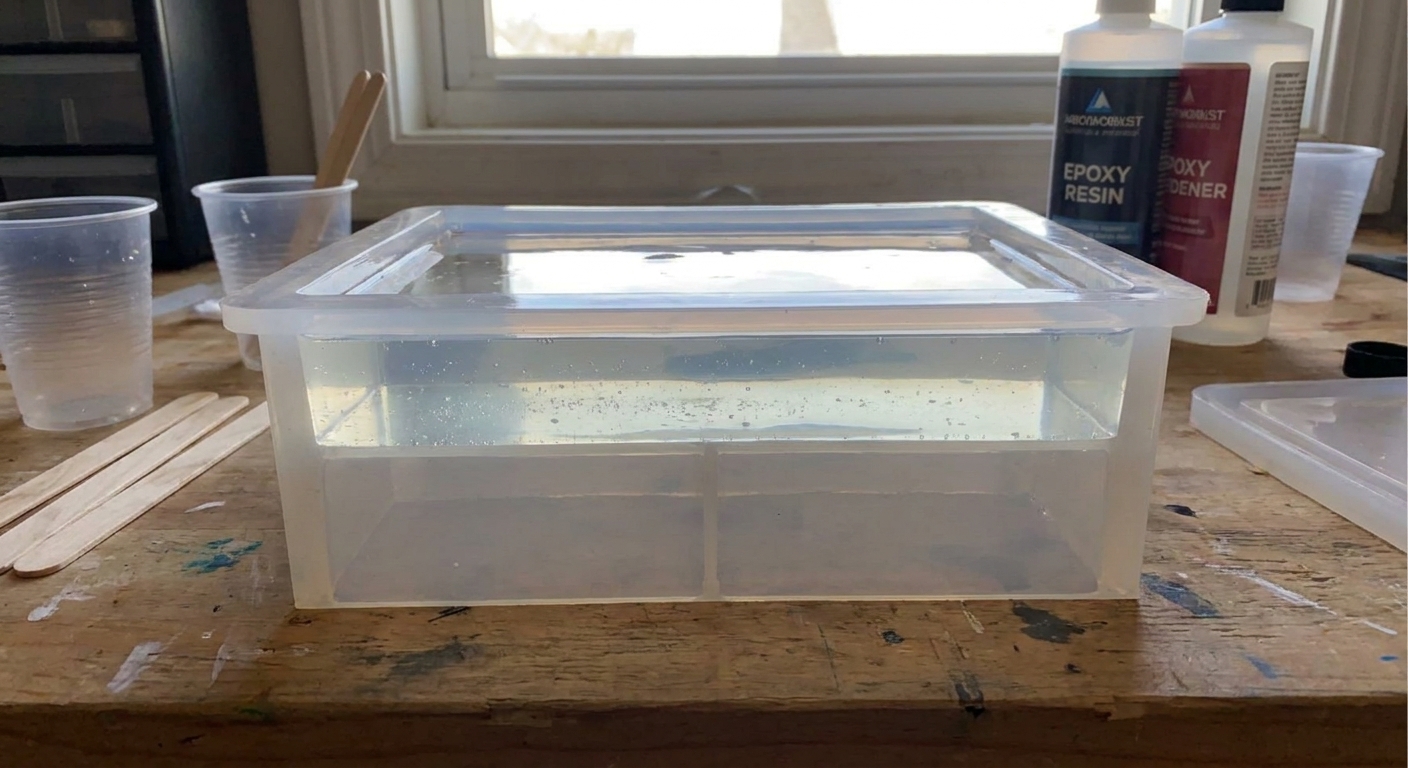
Stop tacky, uncured epoxy. Follow this step-by-step mixing method: confirm ratios, measure by volume or weight, stir slowly while scraping, then do a two-cup...
Resin Wall Clock: Pour, Demold, and Install the Mechanism

Ruby Fletcher
Ruby Fletcher is a dedicated resin crafter with years of hands-on experience pouring, molding, and creating custom epoxy art. After turning her dining room into a makeshift studio, she developed a passion for helping beginners navigate the sticky, colorful world of resin with confidence. She loves sharing practical tutorials, troubleshooting tips, and essential safety guides to make epoxy crafting accessible for everyone.
Published
The first time I made a resin wall clock, I treated it like a coaster that happened to tell time. I poured, I popped bubbles, I walked away feeling smug. Two days later I demolded a gorgeous clock face that wobbled on the wall, had a cranky movement that kept scraping, and a center hole that looked like a tiny beaver had chewed it. So, yes, we are doing this the calm, grown-up way today.
This is a full project guide for a clean, flat resin clock face and a smooth mechanism install, with all the little details that keep your clock from ticking itself into an early retirement.

What you will make
A round epoxy resin wall clock with a centered mechanism and hands, ready to hang. You can keep it crystal clear, swirl pigments, embed dried flowers, or do a faux stone look.
- Skill level: Confident beginner
- Time: 30 to 60 minutes hands-on, plus curing time
- Best resin type: 2-part epoxy (not UV resin) for thickness and stability
Safety and setup first
Clocks are deceptively simple, but they are still a resin project. I always set up ventilation and PPE before I even open bottles.
- Read through my basics if you are new to safe handling: Getting Started & Safety
- Wear nitrile gloves, eye protection, and use a respirator rated for organic vapors when needed. A full breakdown is here: Resin safety gear
- Protect your table. Resin finds edges like it is looking for trouble: Best mats and coverings for resin spills
- Plan your cleanup now, not when you are holding a sticky cup: Clean up and disposal
Temperature matters more than people think. A cold room gives you thick resin, trapped bubbles, and a higher chance of soft cures.
Quick check: aim for a stable, comfortable room temperature and moderate humidity. If you want the full sweet spot guidance, this helps: Ideal temperature and humidity.
Supplies checklist
Resin and tools
- 2-part epoxy resin (use the brand's recommended mix ratio)
- Graduated mixing cups and stirring sticks
- Nitrile gloves, eye protection, and ventilation setup
- Silicone round clock mold or round shallow silicone mold
- Leveling tools: a small bubble level or a leveling app and shims
- Heat tool for bubbles (heat gun or torch used carefully)
If you are still building your basic kit, my beginner list is here: Beginner resin supplies.
Clock mechanism parts
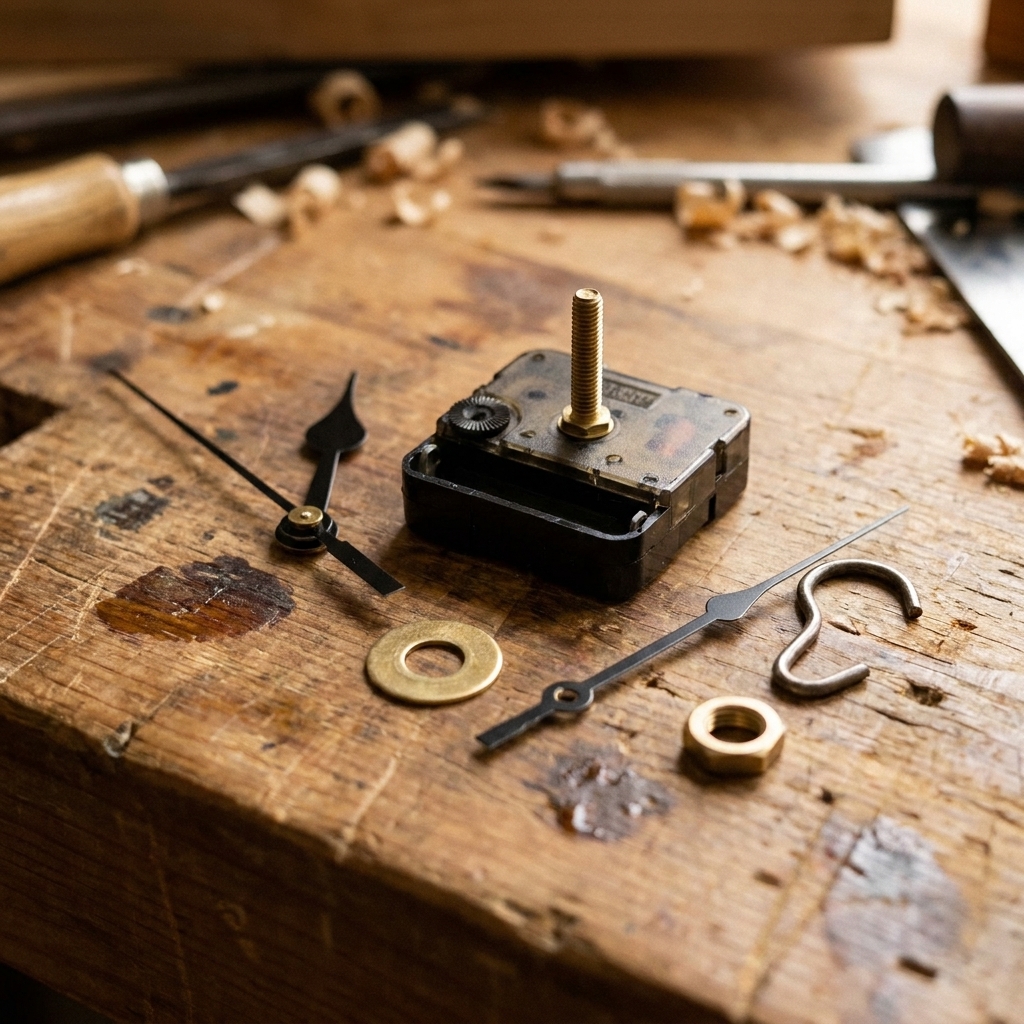
- Quartz clock movement kit that includes a threaded shaft, washer, nut, hands, and hanging hardware
- AA battery (most movements use one)
- Optional: rubber or foam gasket (some kits include one)
Finishing tools
- Drill and a bit sized for your movement shaft
- Painter's tape (for drilling and protecting the surface)
- Sandpaper (wet/dry, assorted grits) and polishing compound if you want a glossy edge
Step 1: Choose a mold and thickness
The movement shaft length is the bossy part of this project. It decides how thick your resin clock face can be.
- Check the movement dial thickness spec: Many movements list a maximum “dial thickness” or show a shaft length. Match your finished resin thickness to that number, with room for the washer and nut.
- Measure the thickness you are actually making: Use a ruler or calipers at the mold rim, because “about this thick” has ruined many a perfectly good afternoon.
- Common thickness range: Resin clock faces are often in the 1/8 to 3/8 inch range, but molds and styles vary a lot. Go by your movement, not by vibes.
If your mold is deeper than your shaft can handle, you have options:
- Pour a thinner clock face.
- Use a longer-shaft movement.
- Cast thick, then drill a shallow recess on the back (advanced, and easy to mess up).
One more important check: respect your resin's maximum pour depth, especially if you are doing a thicker face. Overheating can cause ripples, warping, or a cloudy cure.
Step 2: Prep your workspace and mold
Get perfectly level
A wall clock face needs to be flat. If your table is even slightly off, resin will drift and cure with a thicker side. That can make the clock wobble and can even cause the hands to sit crooked.
- Set your mold on a rigid board or tray you can move without bending.
- Check level in two directions.
- Shim under the board until it is level.
Clean your silicone
Dust in a clock face shows up like it is auditioning for a close-up.
- Wash the mold with mild soap and water if needed.
- Let it dry completely.
- Use tape to pick up lint right before pouring.

Step 3: Mix your resin carefully
This is where clock projects go wrong fast. A clock face looks like a simple pour, which makes it easy to rush the mixing.
Follow your resin's exact ratio and mixing time. My detailed walkthrough is here: How to measure and mix 2-part epoxy resin.
My no-drama mixing routine
- Measure precisely. Do not eyeball. Resin is not a vibe-based craft.
- Stir slowly, scrape often. Scrape sides and bottom for the full mixing time.
- Double-cup if you are unsure. Pour into a clean cup and mix again for 30 to 60 seconds.
If you have ever demolded something that stayed rubbery or sticky, fix that root issue before you attempt a clock: Why epoxy resin is sticky or soft.
Step 4: Color or decorate (optional)
Clock faces are a perfect excuse to use subtle effects because the hands and numbers become the focal point.
- Transparent tint: A drop at a time, especially with dyes.
- Swirls: Pour clear first, then drizzle tinted resin and gently drag with a stick.
- Embedded flowers: Only use fully dried flowers. Moisture causes browning and bubbles over time. I cover drying and embedding here: How to dry and embed real flowers.
For a full color guide, including mica, pastes, and alcohol inks: How to color epoxy resin.

Step 5: Pour the clock face
Pick your front face
Before you pour, decide which side will be your “front.” In many silicone molds, the bottom of the mold (the side touching the silicone) cures the glossiest and becomes the show face. The open pour surface can end up as the back. If you are using a mold designed with a finished front, follow the mold’s intent.
Pour with control
- Start with a thin base layer. This can help resin flow into details and reduce trapped air against the silicone, especially in textured molds.
- Pour the rest slowly. Aim at one spot and let the resin spread outward.
- Stay in your recoat window. If you start with a base layer and plan to add more, pour the next portion while the first is still in the tacky stage so you do not create a visible layer line. For layering timing help, see: Pouring epoxy in layers without visible lines.
- Check depth. Stop at the thickness your movement can handle, and within your resin’s max pour depth.
Bubble check
For a clock face, I want a clean surface because it will be facing forward on the wall.
- Wait 2 to 5 minutes so bubbles rise.
- Pop surface bubbles with a heat tool in quick passes.
- Do not linger in one area or you can warp silicone or cause ripples.
If you want the full bubble toolbox, including micro-bubbles: Prevent and remove micro-bubbles. If you are deciding between a heat gun and a torch, I break it down here: Heat gun vs butane torch.
Cover and cure
Cover your mold with a dust shield that does not touch the resin. I use a clean plastic storage bin flipped upside down.
Let it cure the full recommended time, plus a little extra if your room runs cool. For clock faces, I prefer waiting until the piece is fully hard, not just demoldable, before drilling.
Step 6: Demold without warping
Demolding a large flat piece is different than popping out a small charm. Go slow so you do not flex the clock face.
- Wash your hands or keep gloves on so you do not fingerprint a glossy surface.
- Peel the mold away from the resin, not the other way around.
- Work around the edge gradually until the face releases.
If your piece feels bendy at all, stop and give it more time. A slightly soft clock face can set into a subtle warp if it sits unsupported.

Step 7: Finish edges and fix flaws
Trim and clean
If you have thin flash around the edge, trim it with sharp scissors or a craft knife, then lightly sand.
Sand and polish (optional)
Some silicone molds give you a glossy edge. Some give you a slightly matte edge. Either is fine, but if you want a glassy finish, sanding and polishing gets you there.
I walk through grits and polishing steps here: How to sand and polish epoxy resin.
Cloudy surface?
Cloudiness can come from humidity, pigment overload, aggressive heat, or moisture in embeds. Troubleshooting is here: Why resin turns cloudy. The causes overlap for home decor pieces too.
Step 8: Drill the center hole
Most round clock molds do not come with a perfectly sized center hole for every movement, so drilling is usually the cleanest option. The goal is a centered hole with no chipping.
Find the true center
- If your mold had a marked center point, use it as a guide.
- If not, measure across the face in several directions and mark the midpoint each time. Where the marks overlap is your best center.
- If you want to be extra precise, trace the circle on paper, fold the paper in half twice to find center, then transfer that mark to the resin with a tiny piece of tape.
Protect and support
- Put painter's tape on the front and back where you will drill.
- Support the piece on a scrap wood board.
Drill for a clean hole
Use a sharp bit and low to medium speed. A brad-point bit or a step bit can be easier to control and less grabby than a basic twist bit. Let the bit do the work.
For the cleanest edges, drill halfway through from one side, then flip and finish from the other side using the pilot hole as your guide. It takes longer, but it dramatically reduces chip-out.
I cover drilling technique in detail here: How to drill cured resin. You can ignore the eye pin part and focus on speed, support, and avoiding cracks.

Step 9: Install the mechanism
Do a dry fit before you tighten anything.
Follow your kit diagram
Most movements install from the back with a washer and nut on the front, but washer order varies. Follow the diagram that came with your movement, because it knows what it is trying to be.
Basic order (common setup)
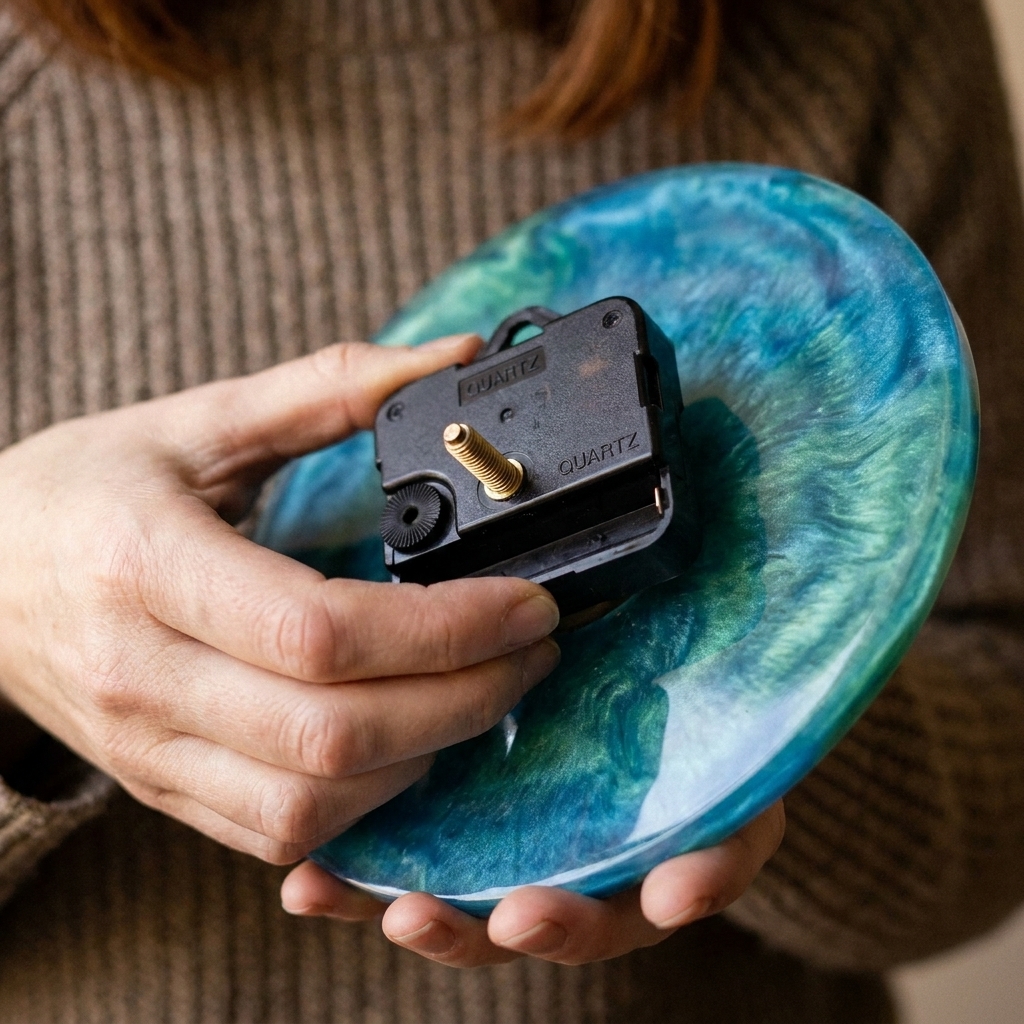
- Insert the movement shaft from the back of the clock face through the center hole.
- On the front, add the washer (and gasket if your kit uses one there).
- Thread on the nut and tighten gently.
How tight is tight enough?
Snug, not cranked. Over-tightening can stress the resin around the hole and can cause tiny cracks later, especially if the clock gets bumped.
Make sure it sits flat
- If the back of your clock face has a slight dome or texture, the movement may rock.
- A thin foam pad, gasket, or carefully placed felt can help stabilize it.
Hanging hardware notes
- Some movements have a built-in hanger. Others need a separate hanger on the back of the clock.
- If you add hardware to resin itself, pre-drill properly. Forcing a screw eye straight into cured resin is a great way to make a crack you will stare at forever.
- Keep the hanger centered so the clock does not tilt.
Step 10: Attach the hands
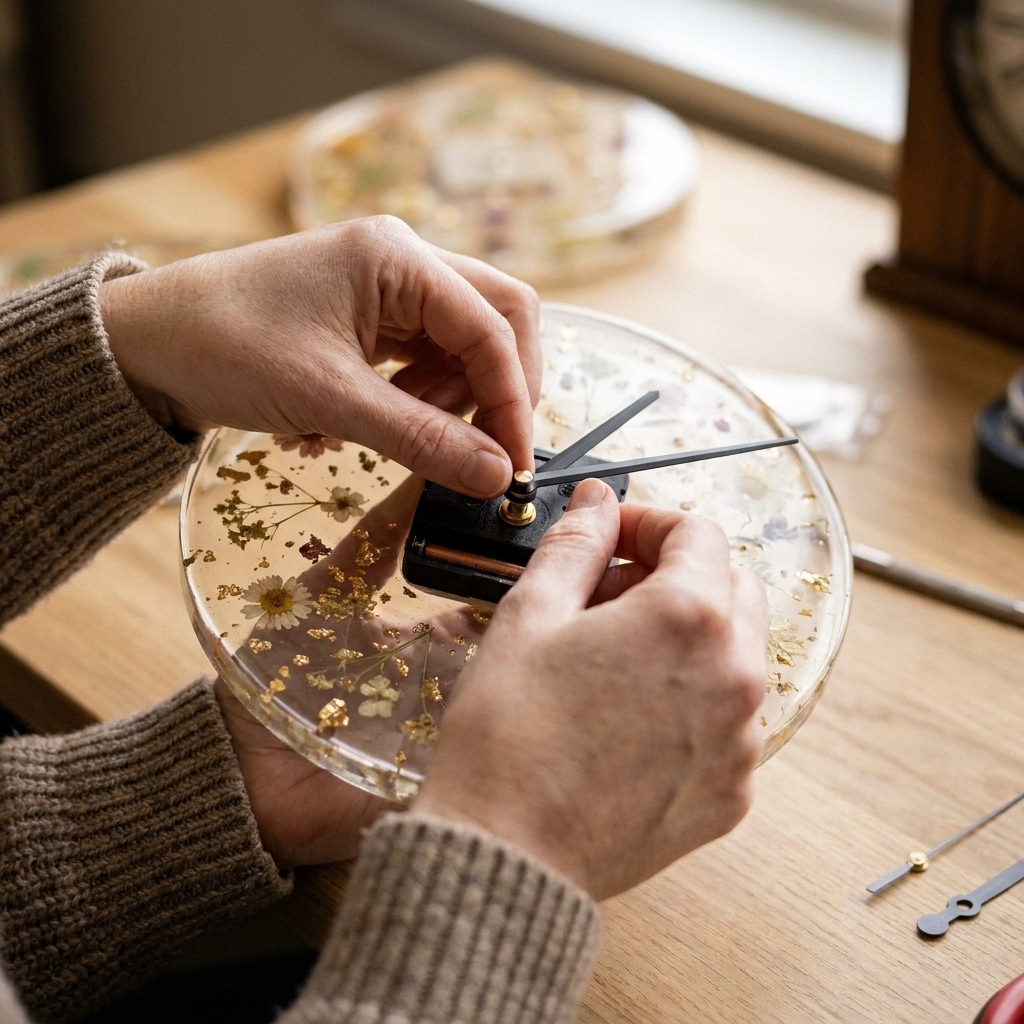
This is the moment where a beautiful resin clock turns into a weird clicking machine if the hands rub each other or the resin surface.
Hand order (typical)
- Hour hand
- Minute hand
- Second hand (if included)
My alignment routine
- Set the hour hand pointing at 12 and press it on evenly.
- Set the minute hand to 12 and secure it according to your kit (some use a small cap nut).
- If you have a second hand, press it on last.
- Gently rotate the minute hand clockwise through a full 12 hours to check clearance. Do not force it. Nothing should scrape or catch.
If the hands scrape
- Hands rubbing each other: Gently bend one hand up or down slightly so they sit on different planes.
- Hands scraping resin: Your shaft might be too short for your thickness, or the nut is tightened in a way that pulls the hands down. Try repositioning, or consider a longer-shaft movement.
- Hands wobble: The hole may be oversized, or the mechanism is not sitting flat. Stabilize the back and re-tighten gently.
Add numbers or markers (optional)
You can keep it minimalist, or add markers so it is readable from across the room.
Easy placement that stays even
- Use a paper guide: Find a paper clock face you like, resize it to match your clock diameter, and use it as a temporary placement guide. Tape it to the front (over painter’s tape) or tape it behind a clear face so you can line up 12, 3, 6, and 9 without guessing.
- Use a protractor method: Mark 12 and 6 first, then 3 and 9 at 90 degrees. From there, each hour mark is 30 degrees apart.
- Vinyl decals: Apply after full cure. Press firmly to avoid lifting later.
- Paint pen markers: Test on a scrap resin piece first to confirm adhesion.
- Embedded markers: If you want inlaid numbers or metal flakes, pour in layers so they sit where you want. My layering tips are here: Pouring epoxy in layers without visible lines.
Hanging and care
- Use a wall anchor appropriate for the clock's weight.
- Keep the clock out of direct hot sun and away from heat vents. Heat can soften resin slightly, and UV exposure can also yellow many epoxies over time.
- Dust with a soft cloth. Avoid harsh solvents or ammonia cleaners.
Troubleshooting quick fixes
The clock face has a curve
- Cause: curing on an unlevel surface, demolding too early, overheating from too-thick pours, or uneven thickness.
- Fix: If the resin is still in its early cure stage, storing it perfectly flat and supported can help prevent the curve from getting worse. Once epoxy is fully cured, it usually will not “self-flatten.” Slight improvement can happen with very gentle warming and careful weighting, but overheating can make things worse. If the warp is obvious and the hands will not clear, remaking is often the cleanest solution.
The resin is tacky
- Cause: inaccurate measuring, under-mixing, or low temperature.
- Fix: identify the cause and follow the rescue steps here: Sticky or soft resin fixes.
Bubbles near the surface
- Cause: thick pour, cold resin, aggressive stirring.
- Fix: warm the bottles (safely, capped, in warm water), pour slowly, and use a quick heat pass. More tips: Micro-bubble guide.
The mechanism runs but time drifts
- Cause: usually the movement itself (battery, inexpensive mechanism, or the hands rubbing).
- Fix: swap the battery first, then re-check hand clearance, then replace the movement if needed.
Variations I love
- Pressed flowers clock: Clear face with a thin base layer, arrange flowers, then cap with a final clear pour.
- Geode-style clock: Pigment bands and glitter near one edge. If you like that look, you might also enjoy: Faux geode resin wall art.
- Ocean clock: White lacing and blue tints for wave effects. The wave technique is similar to what I use on boards: Resin ocean waves.
FAQ
Can I use UV resin for a wall clock?
I would not for a full clock face. UV resin struggles with thicker pours and can cure unevenly unless you have strong, even UV exposure. For a clock, 2-part epoxy is the reliable choice. If you are deciding between types for other projects, this comparison helps: UV resin vs 2-part epoxy.
Do I need a pressure pot?
No. A pressure pot is amazing for bubble-free casts, but you can get a clean clock face with warm resin, slow mixing, a level setup, and careful heat passes.
Should I seal paper or photos if I embed them?
Yes. Unsealed paper can darken, trap bubbles, or separate. Use a proper seal method first: How to seal and embed photos or paper.
How long should I wait before drilling?
At least full cure, not just demold time. If your resin says 24 hours demold and 72 hours full cure, I drill at 72 when I can. It reduces chipping and stress cracks.
More home decor projects
If you want another functional piece after this clock, browse the rest of my favorites here: Home Decor & Functional Art.